Wednesday, January 14, 2015

Collaborative Circle Weaving


Using cardboard looms all 6th-8th grade art students created two small circle weaving for a permanent collaborative installation in the library. Most of the yarn was collected by sending out a district wide email and the cardboard was cut from the numerous Blick art supply boxes I have been saving. With very little cost, and a high level of visual impact, this project was a great success! 


Making the Loom: 

Prep- Cut MANY 3x3 inch squares
1) Using a scissor cut the corners of the square off to make a circle
2) Around the edge mark with a pencil an odd number of evenly spaces lines (13,15, or 17)
3) Using a scissors, make a 1/2" cut towards the center of the loom using the pencil lines as a guide 
4) Poke hole in center of circle 

There are a couple of ways to begin setting up the loom once created. I have written detailed instructions below describing what worked best for us after some trial and error:)

Getting the Weaving Started:
1) Cut 3' of yarn and thread one end with a tapestry needle
2) Holding the loom, stick the needle through the hole from the backside and pull through to the front           side of the loom.
3) Pull until you have 4" of yarn left hanging out the backside of the loom (do not make a knot)
4) Then, holding the 4" tail of yarn with one hand on the backside, take the yarn and place into one of           the 1/2" along the cuts
5) Wrap yarn to the back side and again pull the needle through the center hole from the back side to            the front.
6) Repeat step 4 and 5 until a piece of yarn securely placed in each cut.
7) Using the extra 4" of yarn left of the backside, knot the two ends of yarn together twice. Knot should be resting snugly against the backside of the loom.
8) Stick needle up the center hole one last time.
9) Begin weaving over under over under
10) Tie on additional yarn as needed in different colors as desired:)
11) Tie off yarn once done 

Wednesday, July 23, 2014

Faux Digital Oil Painting


Need a 1-2 Day project before winter or spring break next year? This one is sure to please! All you need is a classroom filled with youngsters, a computer lab with internet access, and a digital photograph. I teach a couple sections of middle school digital photography so I had students explore with both personal and found photos. 


This is a is very basic photo manipulation, but I will break down the steps for you anyway below... :)

Using the free-ware "Pixlr" (pixlr.com, editor version, no download necessary) you first upload an image saved to your computer desktop. Second you will select the "smudge" button in the tool bar on the left hand side of your screen (it looks like a hand with the index finger pointing out). Find a space you would like begin within your photograph and select an area of color. Hold down you mouse and drag across a small area. You should see the colors smear and glide across the area you are working in. Almost like a painting the pixels begin to mix and mingle together, your mouse acting like a paint brush!


Extra Tips: On the upper left hand side of your screen in Pixlr you will see the option to change brush size and alter the strength of the smudge tool. This can be very helpful when needing to work over large spaces of apply small areas of detail.


hyper detail on this one!  
...this student wanted it to look like a still life painting...

lovely!

...more delicious than a Wayne Thiebaud Painting...

what great movement in the "brush" strokes! 

Friday, February 14, 2014

Hat Designs: Wearable Art

Students were given the challenge to use paper, and other 2d or found objects, to create a non-traditonal hat design. After using my teacher website as a resource, we began creating origami shapes (crane, flower, leaf). We talked about the capabilities of paper in becoming a 3d form through folds and pleats. 

After a few days folding origami (which we later used for classroom beautification) the sketching process began. After 6 designs were created we had "mini elbow partner critiques" to help finalize our directions. Then is was work, work, work for a week.  

So in awe over these amazing creations! more to come! 


Tuesday, January 21, 2014

100 Color Challenge


In order to get more comfortable with color mixing for our new water color project I had students attempt a challenge. Using what we know about color mixing (primary, secondary, complimentary) create 100 different colors on one paper. After making a grid of 100 squares the experimenting began.

I was surprised as we worked how many of them stayed engaged. Some were saying it was their FAVORITE project of the entire semester! wow!

Once done they become little art works of color exploration and experimentation. lovely!


Friday, January 17, 2014

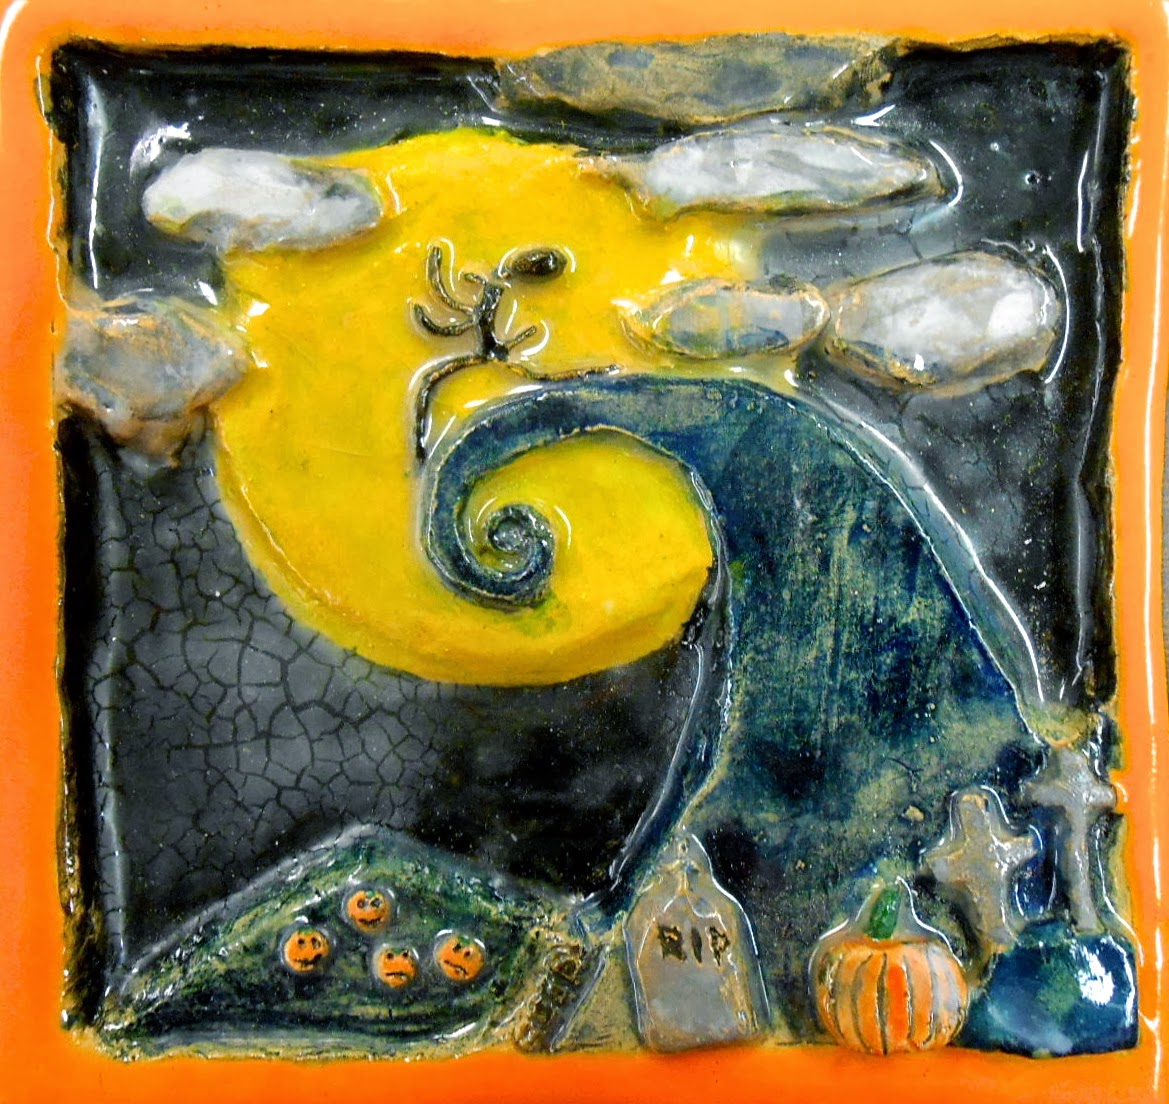
Low Relief Tiles


Students created low relief tiles that involved foreground, middle ground, and back ground while in some way incorporating overlapping. 

Slabs were first rolled out to a 1/2" thickness and then cut to a 6"x6" square. Students then transferred a sketch they made two classes earlier onto the clay surface. 

Over night I let the tiles sit in between two drywall boards to help them reach a leather hard state quickly. 

For the next couple work days students started in their background removing clay. Once the background was cleared they moved onto middle ground and the finally the foreground. 

Final details were added on the last days.

For glazing we used watercolor underglaze amaco paints and coated with a layer of clear transparent glaze. 


Monday, January 13, 2014

Islamic Tiles


These Islamic Tiles were so amazing to see all together in the end! 


On 3"x3" slabs students used symmetrical designs to detail their tiles. Each one of the lines draw is then carved away with a linoleum carving tool to ensure straight crisp lines.

 Once bisque fired students pooled glazes thick in the shapes made from the carved lines. After the final glaze firing we filled the carved areas with grout in order to make the tiles appear like faux mosaics.


Wednesday, December 18, 2013

Salt and Pepper Shakers

 So excited to share these beauties! Like most ceramics projects, the day I unloaded the kiln felt like Christmas! Every time I removed a shelf I got the goosebumps. all of these sets of salt and pepper shakers were made by 6th, 7th, and 8th graders using a double pinch pots method.
Day One: I started by briefly discussed and demonstration the double pinch pot method for creating a closed container. We then looked as some samples from my teacher website of various plastic and ceramic s&p sets.  The students sketched four ideas and chose one to try first. 

Day 2 & 3: Finalized sketches and began creating pinch pots. 

Tips: when creating two pinch pots of the same size start with two spheres of the same size. Create each pinch pot, one representing a hollow half of a sphere. Then, after placing a small support of newspaper on the inside, attach the pots together. (I had the students make a small coil and add it to the welded seam since we can only attach from the outside. 


Day 4-6: Add elements to the pinch pot spheres. Students made trays if their base was round or they finished early.

Pacman
Last day: students release the trapped air by making an opening for the cork on or rear the bottom. Next create holes on top for the salt and pepper to come out (we used needle tools). I ordered mini corks from amazon (100 for around $8, not bad)
Peas in a Pod
These were the shinning center piece for our winter art show! A crowd pleaser for sure!

Lone Minion (the other was still getting glazed) 


Penguin Party 

Pair of Turtles

Roll the Dice

Ninja and Throwing Star

Egg and Dinosaur

Volcano and Mountain


A whole sushi set!

Beautiful swimming sea turtles