Thursday, March 29, 2012

Wayne Thiebaud Desserts... Again:)

Our taste-buds have been excited lately in the art room here at Bert Raney Elementary. Treats of all kinds have been popping up across all grade levels! Her are some examples of 3rd grade layered oil pastel drawings on black paper. They completed sets of four drawings and then taped them together on the back to create an exceptional collection of bright and beautiful drawings.


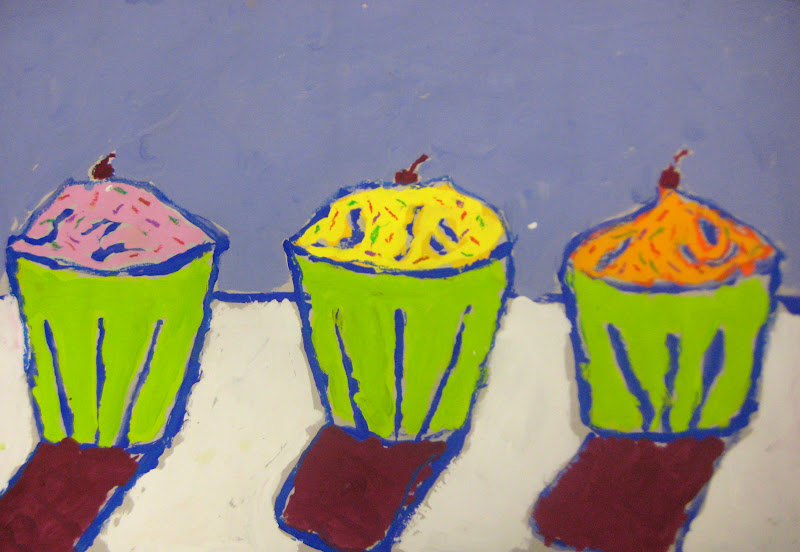
We also completed some tantalizing treats in 5th grade. We created Pop Art paintings inspired by Wayne Thiebaud. After learning how to complete step by step drawings of three different desserts, students sketched multiple desserts onto a final paper. All pencil lines were outlined with blue paint and then an underpainting was laid down. A final coat of paint was added and then oil pastels helped add some final "pop" to the edges.


Thursday, March 15, 2012

Fun with Adirondack Alcohol Inks!

Tile completed during after school program. Coat with a thin layer of sealer for protection. 
I have seen many tile projects posted over the past couple month on art blogs and various crafts sites. I was impressed with the vivid colors and blending opportunities alcohol inks have to offer and had to try it. So much fun in the classroom and on my own! 

A painting I completed on an old transparency sheet using alcohol inks. Using a brush to control the inks I was  able to achieve more details and was actually able to do a bit of color mixing! I plan on doing this technique with an art exportation day with High School students in a couple weeks. 

Wednesday, March 14, 2012

Claymation Videos


3rd-6th Graders recently completed claymation videos over a two day span as part of an activity time offered during after school programs. On day 1 students created their creatures and props out of a non-drying oil based clay. It doesn't dry out so you have the opportunity to reuse it! On day 2 students created their videos, I set high expectations and had them aim to get at least 60 photos taken, more if they could. If you have about an hours time, they need to take a little more than one photo per minute. I would recommend not dragging the photo taking into two class periods. File management once uploaded onto your computer is time consuming and complicating enough.

I'm currently completing a Stop-Motion Animation project with 4th and 5th grade students in my classroom and plan on posting step by step info describing the editing stage of all this. It's truly not all that complicated but I did go through some trial and error that you all could avoid when trying it yourselves. 


Teaching this animation technique was challenging and provided a steep learning curve. I got a handle on common student mistakes after teaching it during after school programs and the recent videos we have completed in the 4th and 5th grade classes have a much higher quality! I'm so excited to share them soon. Until then, I hope you enjoy our first attempt!

Monday, March 12, 2012

Abstract Portraits


As a spin off from our large collaborative mural paintings, 3rd grade students created abstract portraits inspired by Pablo Picasso, specifically his cubist paintings.  We discussed the differences between realistic and abstract portraits while noting the parts of an eye, nose, and mouth that tell our brains we are looking at a face (pupil, iris, nostril, lips, etc). Using a sketching guild we drew four portrait sketches before picking our favorite for the final painting. Once black lines were painted, students filled in shapes with pre-mixed colors. Once dry, each portrait was given fine details and additions using oil pastels. In total, this was around a 4 day project.


Friday, March 9, 2012

Collaborative Mural Painting


Start with slight watered down black tempera paint to begin creating shapes (we created hearts and circles) then connect those shapes with a variety of lines (straight, wavy, zig-zag, loopy, swirls, etc.). Then fill in shapes with color. 
Get every last one!


Once you finish your mural... go help another table!
After the installation was over we FINALLY got to take them home! 
Some detail shots 
COLORS! 
Collaborative art is one of my favorites to bring into an art room. I love that the students have to depend on each and everyone to complete a successful painting. I have done this project over the past couple years, (was actually my first posts way back when! wow!), but never have attempted it at this scale (we decorated the entire front entrance of your school for Heart Disease Awareness, 15 murals in total!)